
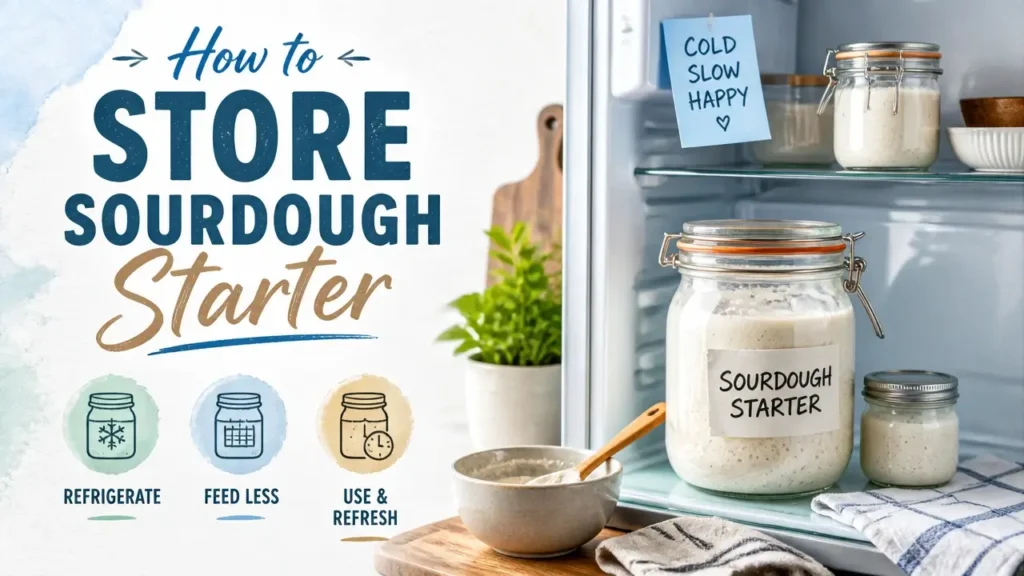
Storing a sourdough starter is less about discipline and more about understanding what your culture actually needs between bakes. Feed it at the right moment, give it a lid that breathes, and it will survive almost anything – a week in the fridge, months in the freezer, or a daily counter routine that keeps it perpetually ready.
The method you choose should match the rhythm of your baking life, not someone else’s. A digital kitchen scale, a wide-mouth jar, and one non-negotiable rule before the fridge goes in – that’s the entire foundation.
Before You Store: Two Things Every Starter Keeper Needs
Starter storage preparation begins with two decisions that happen before you ever open the fridge door – the right container setup and a single feeding rule that prevents more failures than any other piece of advice in sourdough baking. Get these right once, and every approach that follows will work the way it’s supposed to.
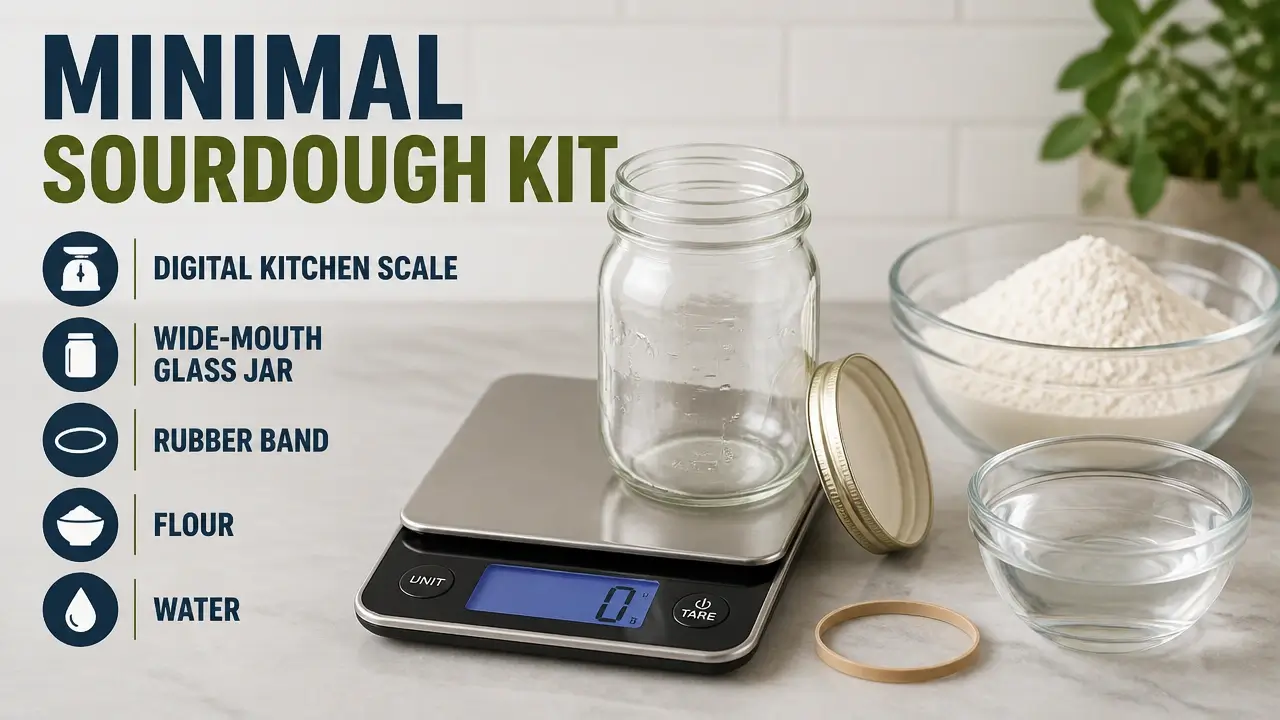
Here’s the minimal kit you actually need. A mature, actively bubbling starter – one that’s been fed at least a few times and shows reliable rise and fall. A digital kitchen scale, because volume measurements are meaningless for flour and water ratios that need to be consistent. A wide-mouth glass jar of at least 500 ml – wide enough to stir easily, tall enough that the starter has room to at least double without hitting the lid. A rubber band stretched around the outside to mark the starting level. Room-temperature water. All-purpose or strong white flour.
The jar matters, but the lid matters more. The wild yeast in your starter produces carbon dioxide continuously, and that gas needs somewhere to go. As the King Arthur Baking Company test kitchen puts it:
“Never seal the jar completely; the wild yeast in your starter produces carbon dioxide gas, which can build up pressure and cause a tightly sealed glass jar to shatter or explode.”
A loose screw cap – turned back half a turn – works. A Weck jar with the rubber gasket removed works. A clip-top jar with the metal bail left undone works. What doesn’t work: any fully airtight seal. And holes drilled into lids are their own problem – large enough to vent CO₂, they’re also large enough to let airborne mould spores in.
Now the one rule that prevents most storage failures: always feed your starter and let it show visible activity at room temperature for one to two hours before moving it into the fridge. Storing an unfed starter is the single most common reason refrigerated starters turn sluggish, develop a thick grey liquid, or take days to wake back up. The microbes need food before they go dormant – not after.
One more thing worth normalising before we go further: discarding a portion of your starter before each feeding is expected and intentional. It controls the volume so you’re not drowning in starter, and it keeps the culture healthy by removing the most acidic portion. This article will show you what to do with that discard, but for now – it’s not waste. It’s maintenance.
Before we get to method selection, there’s one silent hazard that almost never gets mentioned. When you clean your starter jar, use only cold or room-temperature water. Water hotter than 60 °C (140 °F) doesn’t just rinse the jar – it cooks the residual gluten proteins and kills any wild yeast cells clinging to the glass. A quick cold-water rinse after every feeding is all it takes to avoid this entirely.
Here’s what your storage kit should look like before you begin:
Counter Storage: For Bakers Who Want a Starter Always Ready
Counter storage works because it keeps the starter in a continuous active cycle – fed, risen, and ready – without any revival step between the jar and the dough. If you bake every day or every other day, this is the method that matches your rhythm without adding friction.
sourdough starter isn’t rising
The feeding schedule is straightforward: once every 24 hours at room temperature. Use a 1:1:1 ratio by weight – keep 25 g of mature starter, add 25 g of room-temperature water, add 25 g of flour. Stir thoroughly until no dry flour remains, cover loosely, mark the level with your rubber band, and leave it on the counter. That’s the entire routine.
After feeding, your starter should double within four to six hours. When it’s at or near its peak rise, it passes the float test: drop a small spoonful into a glass of water and it floats. A starter that floats is full of active yeast gas and ready to leaven bread. No separate activation step, no waiting – feed it in the morning, bake with it that afternoon.
The honest limitation of counter storage is the daily commitment it requires. If you skip more than one day, the starter runs out of food. The yeast and bacteria begin consuming each other’s byproducts, acidity climbs, and the culture starts to decline. For someone who bakes occasionally, that daily feeding becomes a chore with no payoff. For the daily baker, it’s simply part of the routine.
Daily feeding does produce daily discard, but there’s a way to make that discard do useful work instead of going in the bin. Keep the discarded portion – 25 to 50 g – in a separate small jar. Feed it 1:1:1 and leave it at room temperature overnight for 12 hours. By the next morning, it will be ripe, bubbly, and ready to use directly in your dough as a built-in levain. This syncs naturally with a morning baking schedule and eliminates the need to plan a separate levain build the night before.
Refrigerator Storage: The Infrequent Baker’s Workhorse
Refrigerator storage slows the starter’s metabolism to near-dormancy, stretching the time between feedings from daily to weekly – or longer. For anyone who bakes once a week to a few times a month, this is where the method and the lifestyle actually match.
The feeding schedule after the initial pre-fridge feed (covered in the first section) is simple: store the starter in the refrigerator at roughly 3–5 °C and feed it at least once every one to two weeks. In practice, the most efficient approach is to feed it the day before you plan to bake and not worry about a fixed weekly schedule in between.
The pre-bake revival process follows a consistent pattern. Remove the starter from the fridge. Discard all but about 25 g. Feed it 1:1:1 with room-temperature water and flour. Leave it at room temperature for 12 to 24 hours. If it doubles within that window, it’s ready. If it doesn’t double, feed it again and wait. The goal before baking is a starter that reliably doubles within six to eight hours of a feeding – that’s your signal that the yeast population has recovered from cold storage and is working at full strength.
The mistake that derails this method almost every time is putting an unfed starter straight into the fridge. Prof. Marco Gobbetti, Professor of Food Microbiology at the Free University of Bozen-Bolzano and lead researcher on sourdough microbial ecology, explains the mechanism precisely:
“Storing a sourdough starter under refrigerated conditions (4–10°C) dramatically reduces the maintenance frequency required by bakers, but placing a highly acidic, unfed starter straight into the cold can lead to a severe drop in yeast viability and make reactivation difficult.”
When a starter goes into the fridge without food, the microbes enter a lag phase where they’re stressed but not fully dormant. Acid accumulates, yeast viability drops, and the culture produces excess hooch – that grey liquid that signals starvation. Revival becomes a multi-day project instead of a single overnight feed.
One piece of received wisdom about refrigerator storage is worth correcting directly: the idea that you must feed your fridge starter every week or it will die is outdated. A starter stored at a genuinely cold temperature – around 3 °C – enters a near-dormant state where microbial death is negligible for months. Bakers have successfully revived starters left untouched for six, ten, and even twelve months. The culture is far more resilient than most guides suggest. What matters isn’t a rigid weekly schedule – it’s a structured revival when you’re ready to bake. If your fridge is cold enough, feed only when you intend to bake, and expect the starter to need two to three room-temperature feedings over roughly 48 hours to return to full vigour.
Dried or Frozen: Your Long-Term Insurance Policy
Dried starter backup solves a problem that neither counter nor fridge storage can address: what happens when you won’t bake for months, or when your fridge jar fails and you need to start over without beginning from scratch. This method isn’t a replacement for active storage – it’s insurance.
Drying a starter is straightforward. Feed your starter and let it reach peak activity. Spread a thin layer – a few millimetres at most – onto a silicone mat or a sheet of parchment paper. Leave it at room temperature for 24 to 48 hours until it’s completely brittle and snaps rather than bends. Crumble or grind the dried flakes, then store them in an airtight container in a cool, dark pantry. Dried starter stored this way remains viable for six to twelve months.
Freezing is a viable alternative, particularly if you want to preserve a specific culture exactly as it is. Portion a small amount of actively fed starter into an airtight, freezer-safe container and freeze it immediately after peak activity. Frozen starter can survive up to a year, though some microbial activity is inevitably lost in the process. Dr. Raffaella Di Cagno, Senior Researcher in Food Microbiology and co-author of studies on sourdough preservation, describes the tradeoff directly:
“Frozen storage enables until 90 days a partial preservation of the starter LAB… A further method of storage, which is applied in case the storage time is longer, consists in drying the sourdough simply by addition of flour, followed by grinding.”
To revive dried starter, combine the flakes with an equal weight of warm water – around 28 °C – and stir to dissolve. Add an equal weight of flour and mix well. Leave at room temperature and resume a daily 1:1:1 feeding schedule. Full activity typically returns in three to five days as the yeast and bacteria populations rebuild.
The best-fit use case here is anyone who won’t bake for several months, anyone who wants a safety net alongside their fridge routine, or anyone who wants to share their starter with someone by post. Dried flakes travel well, survive postal delays, and revive reliably on the other end.
Here’s a side-by-side look at how all three methods compare across the variables that matter most for planning your storage approach:
| Storage Method | Feeding Schedule | Revival Time | Best-Fit Baking Frequency | Maintenance Effort |
|---|---|---|---|---|
| Counter | Every 24 hours | None – always ready | Daily or every other day | High – daily attention required |
| Refrigerator | Every 1–2 weeks (or before baking) | 12–24 hours (1–2 feedings) | Once a week to a few times a month | Low – feed before baking |
| Dried / Frozen | None during storage | 3–5 days of daily feeding | Seasonal, rare, or backup only | Minimal – set and forget |
Reviving a Neglected Starter: Grey Liquid Is Hooch, Not Mould
Starter revival begins with correctly identifying what you’re actually looking at – because the grey liquid that appears on top of a neglected starter is almost always misread as a sign of death or contamination. It isn’t. It’s hooch: an alcoholic liquid produced by the yeast when the starter runs out of food and begins fermenting its own byproducts. Hooch is a starvation signal, not a spoilage signal.
Mould looks entirely different. Mould is fuzzy – visually raised and textured – and appears in black, green, or pink patches on the surface or sides of the jar. If you see mould anywhere in the starter, discard the entire culture and the jar. There’s no saving it. But if what you see is a liquid layer – grey, clear, or slightly brownish – that’s hooch, and the starter underneath it is almost certainly fine.
To begin the revival, pour off the hooch or stir it back in – both work, though pouring it off removes some of the excess acidity. Transfer about 25 g of starter from the centre of the jar into a clean container, leaving the most acidic outer portions behind. Feed it 1:1:1 with room-temperature water and flour.
Warmth is the most important variable in revival. A starter coming back from dormancy needs a consistently warm environment – ideally 25 to 26 °C (78 to 82 °F). The kitchen counter in winter may not be warm enough. A spot near the oven, on top of the refrigerator, or inside a turned-off oven with just the light on will all work. A cooler revival environment isn’t fatal – it’s just slower.
The vague instruction to “feed it a few times” is where most revival attempts stall, because it gives no timeline to follow. Here’s a concrete 48-hour protocol that works for starters that have been dormant for weeks or months. Day 1 morning: discard all but 25 g of starter, feed 1:1:1, mark the jar, and leave it in your warmest spot. Day 1 evening: if it hasn’t doubled in 12 hours, feed again 1:1:1. Day 2: the starter should now double within six to eight hours of a feeding. If it doesn’t, give one more feeding and wait. Two to three feedings over roughly 48 hours is the realistic expectation – not one dramatic recovery feed.
The starter is ready to bake with when it reliably doubles within six to eight hours after a feeding and a small spoonful floats in water. Both signals need to be present. A starter that floats but doesn’t double consistently isn’t back to full strength yet.
This video walks through what a starter looks like at different stages of revival, which is useful if you’ve never seen the progression before:
Which Storage Method Fits Your Baking Life
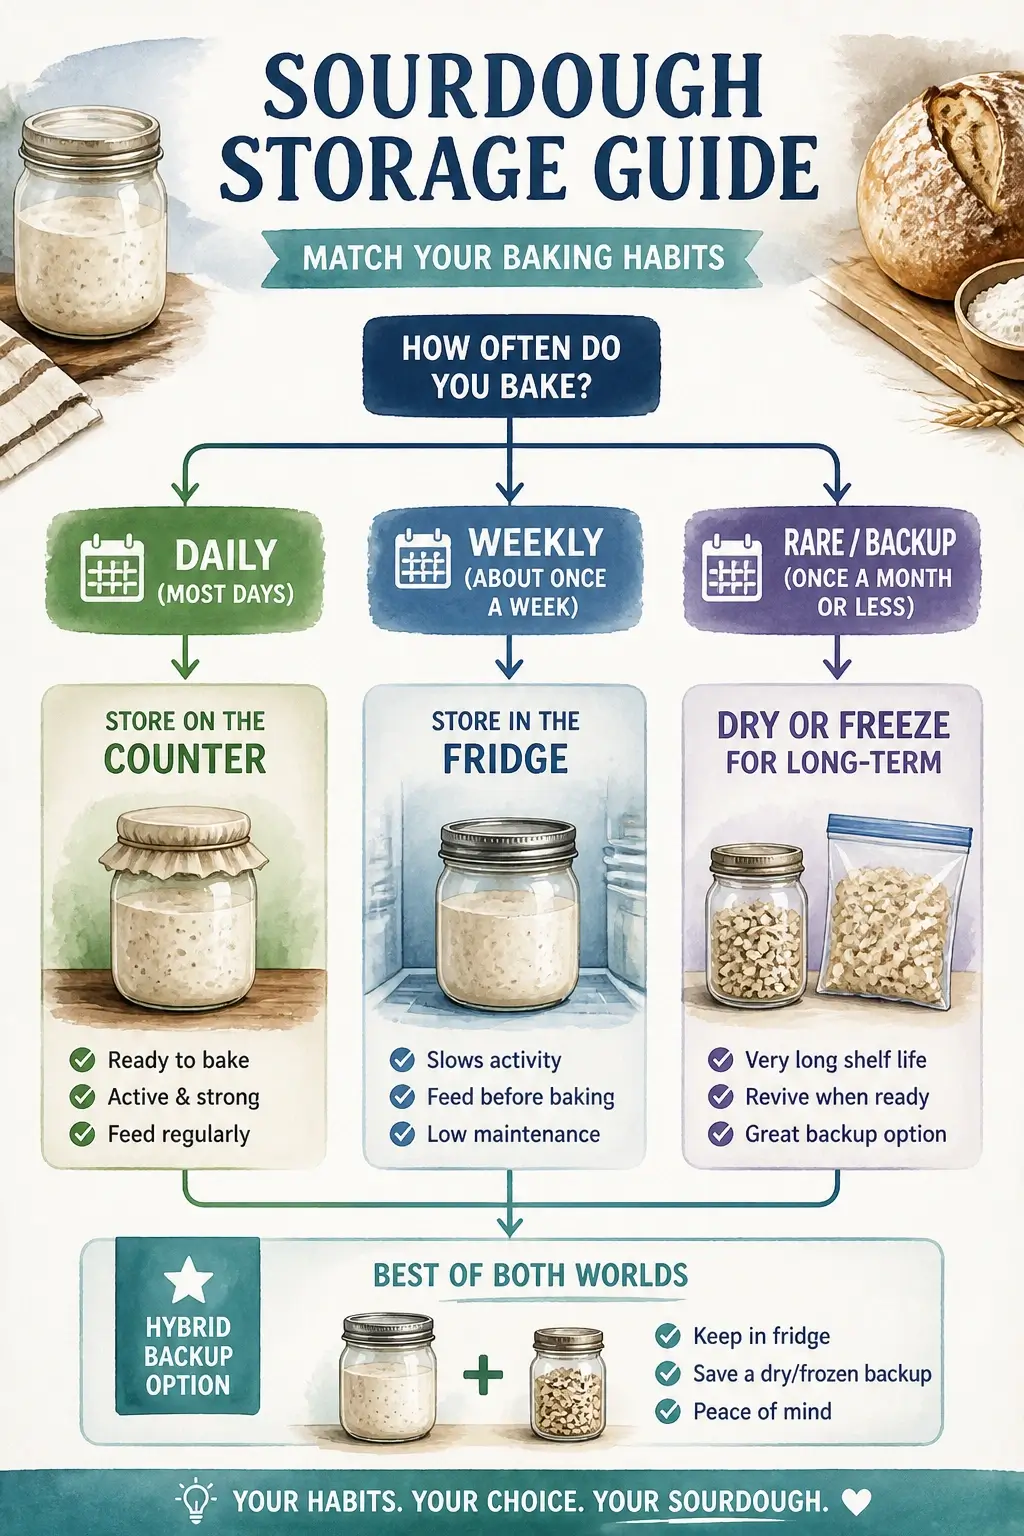
Storage method selection comes down to one question: how often do you actually bake? Not how often you intend to bake – how often you open the oven for bread. The answer maps directly to the right approach, and no method is better than another in the abstract.
If you bake daily or every other day, counter storage is the right fit. The daily feeding matches your rhythm, the starter is perpetually ready, and there’s no revival step standing between you and a same-day bake. The daily discipline required isn’t a burden when you’re baking into it every day.
If you bake once a week to a few times a month, refrigerator storage is where the effort-to-reward ratio works in your favour. Feed the starter the day before you plan to bake, let it come back to room temperature and double overnight, and use it. That’s the entire routine. Flour consumption drops, daily attention disappears, and the starter stays viable between bakes without any intervention.
If you bake rarely, seasonally, or simply want a safety net, a dried or frozen backup alongside your fridge routine gives you insurance without ongoing maintenance. The fridge jar handles your regular bakes; the dried flakes in the pantry handle the scenario where the fridge jar gets forgotten, contaminated, or accidentally discarded.
The most practical long-term approach for most occasional bakers is a hybrid: a fridge starter for regular bakes and a small jar of dried flakes stored somewhere cool and dark. The Puratos Sourdough Library, the world’s leading institution on sourdough biodiversity and preservation, frames the principle clearly:
“Bakers must align their storage strategy with their baking frequency: daily bakers should maintain active room-temperature counter cultures; weekly bakers should utilize refrigeration at 4°C with a monthly or weekly refreshment; and long-term backups require freeze-drying or ultra-low temperature cryopreservation to protect genetic stability.”
None of these methods is permanent. You can shift from counter to fridge as your schedule changes, or dry a backup whenever you’re heading into a quieter baking period. The starter will adapt as long as the core rules remain consistent – a lid that breathes, a feed before the fridge, and a structured revival when you need it.
Use this decision tree to find your starting point:
Key Takeaways on Storing Sourdough Starter
- Always feed your starter and let it show visible activity for one to two hours before moving it into the fridge – skipping this step causes most refrigerator storage failures.
- Never seal a starter in a fully airtight container; CO₂ buildup from active yeast can shatter a sealed glass jar.
- Counter storage suits daily bakers; refrigerator storage suits bakers who bake once a week to a few times a month.
- Grey liquid on a neglected starter is hooch – a starvation signal – not mould; pour it off and begin a structured revival feeding.
- A reliable revival takes two to three feedings over roughly 48 hours; the starter is ready when it doubles within six to eight hours and passes the float test.
- The most resilient long-term approach is a hybrid: a fridge starter for regular bakes and dried flakes in the pantry as a backup.
Frequently Asked Questions About Storing Sourdough Starter
How do I store my sourdough starter when I’m not baking?
Feed it, let it show visible bubbles for one to two hours, then store it loosely covered in the fridge at around 3–5 °C. You don’t need to feed it again until the day before your next bake.
How long can a sourdough starter actually survive in the fridge without feeding?
A starter held at a genuinely cold temperature – around 3 °C – can survive months without feeding, not just weeks. Bakers have successfully revived starters left untouched for six to twelve months, provided the revival is done with a structured sequence of room-temperature feedings.
What is the biggest mistake you can make with a sourdough starter?
Putting an unfed starter straight into the fridge is the single most damaging thing you can do. Without food, the yeast viability drops sharply in cold storage, excess acid accumulates, and what should be a simple overnight revival turns into a multi-day rescue operation.
What does hooch mean and should I stir it in or pour it off?
Hooch is the grey or brownish liquid that separates on top of a hungry starter – it’s an alcoholic byproduct of yeast starvation, not a sign of spoilage. You can do either: pouring it off removes some excess acidity, which can speed up revival; stirring it back in is harmless and wastes nothing.
Can I use my starter straight from the fridge without reviving it first?
Technically yes, but the results will be unreliable. Cold-stored starters have a reduced yeast population and elevated acidity, which means slower, weaker fermentation in your dough. For predictable results, always bring it to room temperature and confirm it doubles before using it.
Is a dried starter backup actually worth the effort?
It’s about 15 minutes of active work for months of insurance. If your fridge starter ever gets contaminated, accidentally discarded, or simply dies during a long break from baking, dried flakes in the pantry mean you’re rehydrating rather than rebuilding from scratch.
Why does my starter smell like acetone or nail polish remover?
That sharp chemical smell is ethyl acetate, a byproduct of high acidity and yeast stress – usually from going too long between feedings. It’s not dangerous, but it signals that the culture needs a few consecutive feedings at a 1:1:1 ratio to rebalance the microbial population. The smell should fade within two to three feedings.
Can I switch from counter storage to fridge storage without harming my starter?
Yes, and the transition is straightforward. Feed the starter at your usual counter ratio, let it show active rise for one to two hours, then move it directly into the fridge. The culture adapts to the temperature change without any special preparation – the key is that the microbes have food before they go dormant.
References
- Sourdough Starter: A Starter Guide – KingArthurBaking.com
- Sourdough Microbial Ecology and Refrigerated Storage Research – Prof. Marco Gobbetti, Free University of Bozen-Bolzano
- Sourdough Preservation and Type-I and Type-III Starter Studies – Dr. Raffaella Di Cagno, Food Microbiology Research
- Sourdough Library Preservation Framework – Puratos.com